A review of reviews! How droll! Let’s get started.

Step 1: Pick a pen. Any pen. How about..yes, that one.
On completely arbitrary whims, I select a pen (or someday pencil) to review.

Step 2: Pull out review journal. Don't just leave it sitting there, doofus, you need to open it!
Then I pull out my trusty Behance Dot Grid Journal. I like this journal for several reasons: it was on sale (note the elegant creases and wrinkles in the cover; it was like that when I bought it), the paper was white (sorry Moleskine, Leuchtturm 1917, Picadilly, and every other cream-colored loving notebook), and it was a dot grid. Dot grids give me enough structure to keep my writing in line (left to its own devices it will start to droop down off the page), but don’t get in the way of my drawings. The paper is also quite absorbent, which has on many occasions fooled me into thinking I was dealing with a quick-drying pen. Any pen that would have ink pool and take forever to dry on other paper gets sucked right up (and slowly seeped through the back of the page), meaning less smudge to worry about. I am learning to put something underneath the page I’m writing on, so bleed through doesn’t ruin my other pages, but I was not quick to learn this.

Step 3: doodle whatever until satisfied with or resigned to fate.
Then I start drawing. I don’t think I’ve ever gone in with a plan of what I want to draw, and I never use anything but the pen to be reviewed (except on the watercolor brush review, I did have outlines using other pens and some penciling beneath). My drawings would look a lot nicer if I did some pencilwork beforehand…they would also probably take twice as long. This process is already involved enough; I don’t need more ways to expend time here. When I doodle, I try to demonstrate the range of the pen’s capabilities: thick lines, thin lines, quick lines, slow lines, light touch, heavy touch, anything I can think of. One day, I’ll even remember to do a watercolor test right on the page. Any mistakes made are left as is, or worse I’ll try to correct them and provide excellent examples of scribbly blobby messes. The written review progresses much like the doodles–I put down whatever without much preconceived notion of what I want that whatever to be. I have this vague notion that I try to make the written portion be about the experience of writing with the pen, but don’t hold me to that.

Step 4: Flip to a blank page, it's time to take pictures of pens!
Ok, so now the page is covered in ink. No going back on that part. It’s time to hope that I find myself in halfway decent lighting conditions, because I’m gonna take pictures anyway! Lunch break at work is usually well lit, but fluorescent. My desk at home exists in a dimly incandescent cave. If I didn’t have a good camera, this entire enterprise would be doomed, as I seem hell-bent on taking pictures only in the worst conditions possible. Sometimes I’ll have an idea of certain pictures I need to take of a pen–say I noticed some interesting feature, like the spring in the cap of the Platinum Preppy fountain pen–but usually it’s just a standard run down: overall picture, cap: posted and unposted / plunger: deployed and not deployed, close up of writing tip, and some kind of lovely picture usually featuring some extreme Dutch angle. Depending on the color of the pen, I’ll either use the dot grid paper or the cover of the journal as a backdrop. Or I’ll use my desk. Or, if some nice surface catches my eye; there’s no hard and fast rule on this. If fancy is struck, then that’s what I go with.

Step 5: The camera. A Nikon Coolpix P80. Yes, my camera is taking a picture of itself in the bathroom mirror, like a moody teenager.
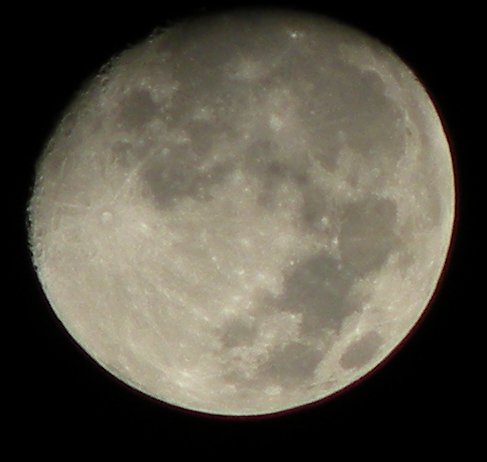
I got this camera back in 2008 as a birthday gift from my parents. It’s a 10.1 megapixel camera with an 18x optical zoom lens; not a digital SLR, but no mean little pocket rectangle either. I’ve taken over 10,000 pictures with this camera in about 8 different countries, capturing everything from the moon to all these excruciatingly zoomed-in nib shots. It’s a good camera, and I know it pretty well by now. Most of these images I take with the ISO set to 64, and the focus set to either macro or manual focus (when the camera decides to be difficult and not focus on a too-close pen). With such a low ISO and the bad lighting I’m so fond of, I usually have to find some facsimile of a tripod to keep the camera still enough for a clear shot. You see that little tripod in the picture of my camera? Rarely is that thing somewhere I can find it.

Step 6: Rage at unspeakably crappy scanner for ruining all color. Contemplate buying new scanner.
Once I’m satisfied with my pictures (or tired of taking pictures), I load them up and run them through Photoshop (if I’m at home) or GIMP (if I’m out and about on my laptop). I prefer Photoshop; I find it’s easier to make composite images in Photoshop (and find it personally impossible in GIMP; canvas resizing and I simply do not understand each other in GIMP). I don’t do anything fancy, just crop and adjust the levels to bear some semblance to what reality looked like. Then, I fire up my antiquated, color-devouring scanner for another round of futility. This scanner is maybe six, perhaps seven years old? Hot stuff, back in its day. These, however, are not its days. These days are the days in which some sort of bluish hue suffuses every scan, and in which all red tones seem to slowly seep away. I then use my primitive Photoshop skills to attempt some harebrained combination of levels altering and color balancing and random attempts at variation in the vain hope that I will be able to, here, really and truly represent that precise fuchsia shade of fandango I see on the page before me. Or whatever color I’m dealing with. I’m usually pretty close, and completely plagued with doubt about it.

All the king's horses and all the king's men couldn't photoshop this image to look fandango again.

Completely unedited scan. Sure, it looks alright after heavy rounds of editing, but look what I have to start with.
Then I get over it, because it’s time to rein this lackadaisical train wreck into coherence. I add pictures to each post in whatever order seems to make sense at the time, writing what comes to mind as I go along. I try to cover all the points I never have room for in the written review–comments about the body and design of the pen, strange tales associated with said pen, and any flaws I’ve encountered in my experience. Even pens I really like are rife with flaws, and I want to make sure those are duly noted. It’s nice to know what you’re getting into before you buy something. Also, well-worded complaints are the meat and potatoes (or potatoes and tofu, if you are so inclined) of interesting conversation, right? There are only so many ways I can say “this is a nice pen;” but I can find ways to say “this ink-shooting monstrosity is an unmitigated disaster from plunger to nib” all day long. :)
After an hour or so of futzing, I’ll finally publish a post. Then I’ll realize I didn’t post any tags and hurriedly scramble to throw sensical tags on before anyone is the wiser. Then I’ll smile complacently at the screen, trying to ignore the fact that it’s five in the morning, and I’ve just stayed up all night writing about pens.
Uh, any questions? :)
